How do I export a 3d model from Revit to AutoCAD?
In this regard, can you convert a Revit file to AutoCAD?
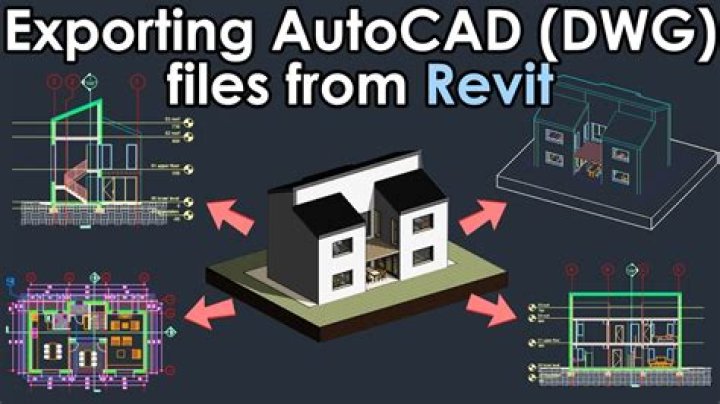
Just in case you need to convert a 3D Revit model to 3D AutoCAD, here ya go. With the Revit model open, Click the Application Menu (“Big R”) > “Export” > “CAD Formats” > Select “DWG“. In the “DWG Export” dialog box – Click on the ellipsis (button with 3 dots) to open the “Modify DWG/DXF Export Setup” dialog box.
Also, how do I export a Revit model? On the Manage tab, click Manage Links (under Manage Project panel). Click through the tabs to remove all the unused or old links (AutoCAD and Revit) from the file. and Save As , Project. Save the file with the same filename as your original Central File but in a new location.
People also ask, how do I export a layer from Revit to CAD?
Under File > Export > Options, click on Export Setups DWG/DXF to bring up the Modify DWG/DXF Export Setup settings. This is where Revit goes to look to figure out how to draw your amazingly modeled elements into silly flat linework on layers.
How do you change from 3d to 2d in Revit?
Shift-tab also cycles through open Revit views. If you only have a plan view and a 3D view open, then shift-tab will quickly take you from one view to the next. If you have multiple views open, then assigning a keyboard shortcut such as XX to Close-hidden-windows will help control how many views you have open.
Related Question Answers
How do I send a Revit file?
On the eTransmit panel of the Add-Ins tab, click Transmit a model. Choose the model(s) to transmit: Click Browse Model, and navigate to the location of the Revit model you want to transmit. Click Browse folders, and navigate to the folder that contains the Revit models you want to transmit.How do I view a Revit file?
Re: How to view . rvt file if you don't have Revit- Use the free online A360 Viewer.
- Download the free Design Review 2013 and export the Revit model as a DWF.
- Use the Revit viewer mode.
- If you have Navisworks, you can open the Revit file in Navisworks, then save as an NWD file.
How do I open a Revit file without Revit?
You have the following options to view a Revit model without Revit:- Use the free online A360 Viewer.
- Download the free Design Review 2013 and export the Revit model as a DWF.
- Use the Revit viewer mode.
- If you have Navisworks, you can open the Revit file in Navisworks, then save as an NWD file.
What is Revit file format?
Revit supports a wide range of industry standards and file formats, including: Revit native formats: RVT, RFA, RTE, RFT. CAD formats: DGN, DWF, DWG, DXF, IFC, SAT, and SKP. Image formats: BMP, PNG, JPG, JPEG, and TIF. Other formats: ODBC, HTML, TXT, and gbXML.How do I export a selection in Revit?
for Export, select <current view/sheet only>. for Export, select <In session view/sheet set>, and then select the views and sheets to export. If you are ready to export, click Next. To save the current export settings and close the dialog without exporting, click Save Set & Close.What is a DXF file?
AutoCAD DXF (Drawing Interchange Format, or Drawing Exchange Format) is a CAD data file format developed by Autodesk for enabling data interoperability between AutoCAD and other programs.Can you open Revit files in AutoCAD?
No. AutoCAD (any version) cannot open Revit files.Does Revit have layers?
When you hide layers in an imported file or a linked file, the layers are still available to the Revit project, but they do not display in views. You can specify how to hide layers in each view. For example, you can display all layers in one view, but hide some layers in another view.How do you manage layers in Revit?
Help- Open the project.
- Click Manage tab Settings panel (Object Styles).
- In the Object Styles dialog, click the Imported Objects tab.
- Click to expand the DWG file name of the file. Revit lists the layers in the file.
- For each layer, change the values for Line Weight, Line Color, or Line Pattern, as desired.
- Click OK.
How do you create layers in Revit?
Help- Open the project.
- Click Manage tab Settings panel (Object Styles).
- In the Object Styles dialog, click the Imported Objects tab.
- Click to expand the DWG file name of the file. Revit lists the layers in the file.
- For each layer, change the values for Line Weight, Line Color, or Line Pattern, as desired.
- Click OK.
How do I share a Revit model?
On the eTransmit panel of the Add-Ins tab, click Transmit a model. Choose the model(s) to transmit: Click Browse Model, and navigate to the location of the Revit model you want to transmit. Click Browse folders, and navigate to the folder that contains the Revit models you want to transmit.What 3d files can Revit import?
Revit supports the import of ACIS objects contained in DWG, DXF, DGN, and SAT files. You can incorporate a Trimble® SketchUp® design into a Revit project to provide a starting point for the building model. You can import 3D geometry from supported file formats and applications.How do I save a Revit model as central?
Help- Open the existing workshared file.
- Click File tab Save As (Project).
- In the Save As dialog, rename the file, and click Options.
- In the File Save Options dialog, select Make this a Central Model after save.
- Select a default workset for local copies.
- In the Save As dialog, click Save.
What formats can Revit export?
Revit supports a wide range of industry standards and file formats, including:- Revit native formats: RVT, RFA, RTE, RFT.
- CAD formats: DGN, DWF, DWG, DXF, IFC, SAT, and SKP.
- Image formats: BMP, PNG, JPG, JPEG, and TIF.
- Other formats: ODBC, HTML, TXT, and gbXML.
Can you 3d print a Revit model?
Unless you want to print at a large scale, and possible in multiple pieces, there's just not a good workflow to create a 3D print directly from a Revit model. We export from Revit as fbx, import into Max, delete the cameras and sun, export as an STL, and import that into the Makerbot software.How do I export FBX from Revit?
Export to FBX- In Revit, open a 3D view, and prepare it for export.
- Click File tab Export (FBX).
- In the Export 3ds Max (FBX) dialog, for Save in, navigate to the target folder for the exported file.
- For Files of type, select one of the following formats:
- For Naming, do one of the following:
- For Use LOD, do one of the following:
How do I export a Revit file from STL?
Export your Revit Model to a STL File- Click Add-in tab STL Exporter panel (STL Exporter for Revit).
- On the General tab, specify your STL file options.
- On the Categories tab, specify which element categories will export to the STL file.
- Click Save to create the STL file or click Cancel to close STL Exporter.